So if you know me well, you would know that I'm not a huge fan of traditional Indian sweets. There's a handful of them that I really enjoy and rasmalai is one of them. It was my one and only major sweet craving while pregnant (apart from frozen yogurt). But too bad I didn't know this recipe existed back then.. probably a good thing LOL.
If you do make this recipe for a party, don't reveal the secret and it's simplicity to your guests. Yep, it's that good and that easy.
This past Diwali, I made this recipe for the first time and the entire batch disappeared pretty quick.
Ingredients:
- 1 can of ready made rasgolla (I am partial to Haldirams)
- 1/2 cup condensed milk (adjust for desired level of sweetness)
- 2 cups of whole milk
- Few strands of saffron
- Cardomom seeds (5-6)
- Toasted chopped almonds or pistachio to garnish
Method:
1. Drain the rasgollas from the can and squeeze out all the extra syrup. Use a lemon squeezer if you have one, or else just gently place a large can or heavy pan over a plate of rasgollas and drain out the syrup. The rasgollas can crumble if you place too much weight so be careful! This is the hardest step of the process, I promise!!
2. In a large pot, combine the condensed milk and regular milk, cardamom and saffron and bring to a gradual boil.
3. Add the drained rasgollas and simmer for 5-10 minutes.
4. Add chopped nuts for garnish and enjoy warm or cold!
Showing posts with label Dessert. Show all posts
Monday, December 29, 2014
Thursday, December 25, 2014
Gingerbread Cheesecake Bites
I was looking for an easy party holiday dessert to take to my husband's work Christmas Party last week when I stumbled upon this thanks to PINTEREST!!! I'm not a Pinterest-aholic by any means but I go on every once in a while when I'm bored of my recipes and want to venture into something I've never made before. Usually I'm pretty successful :)
This one is particularly GENIUS because it has only 4 ingredients!
- Storebought premade gingerbread cookie dough - found in the refrigerated section of your grocery store
- OR (as in my case), gingerbread cookie dough mix in a box- usually needs egg, water and butter to make the dough
- 4oz cream cheese
- 1 tsp vanilla extract
- 2 cups powdered sugar
Method:
1. Preheat oven to 350 degrees F.
2. Once you've made the cookie dough according to package directions, make 1 tsp balls and place them in a mini cupcake lined tin.
I even used some festive ones :)
3. Use the back of the teaspoon (back dipped in flour) to press the dough to form a cup.
4. Beat cream cheese, powdered sugar and vanilla and get it into a ziptop bag , with the end cut ready for piping.
5. Fill the cups about half or a little more than half way up the top. Sprinkle with red sugar glitter and bake for 10 minutes.
Thursday, July 31, 2014
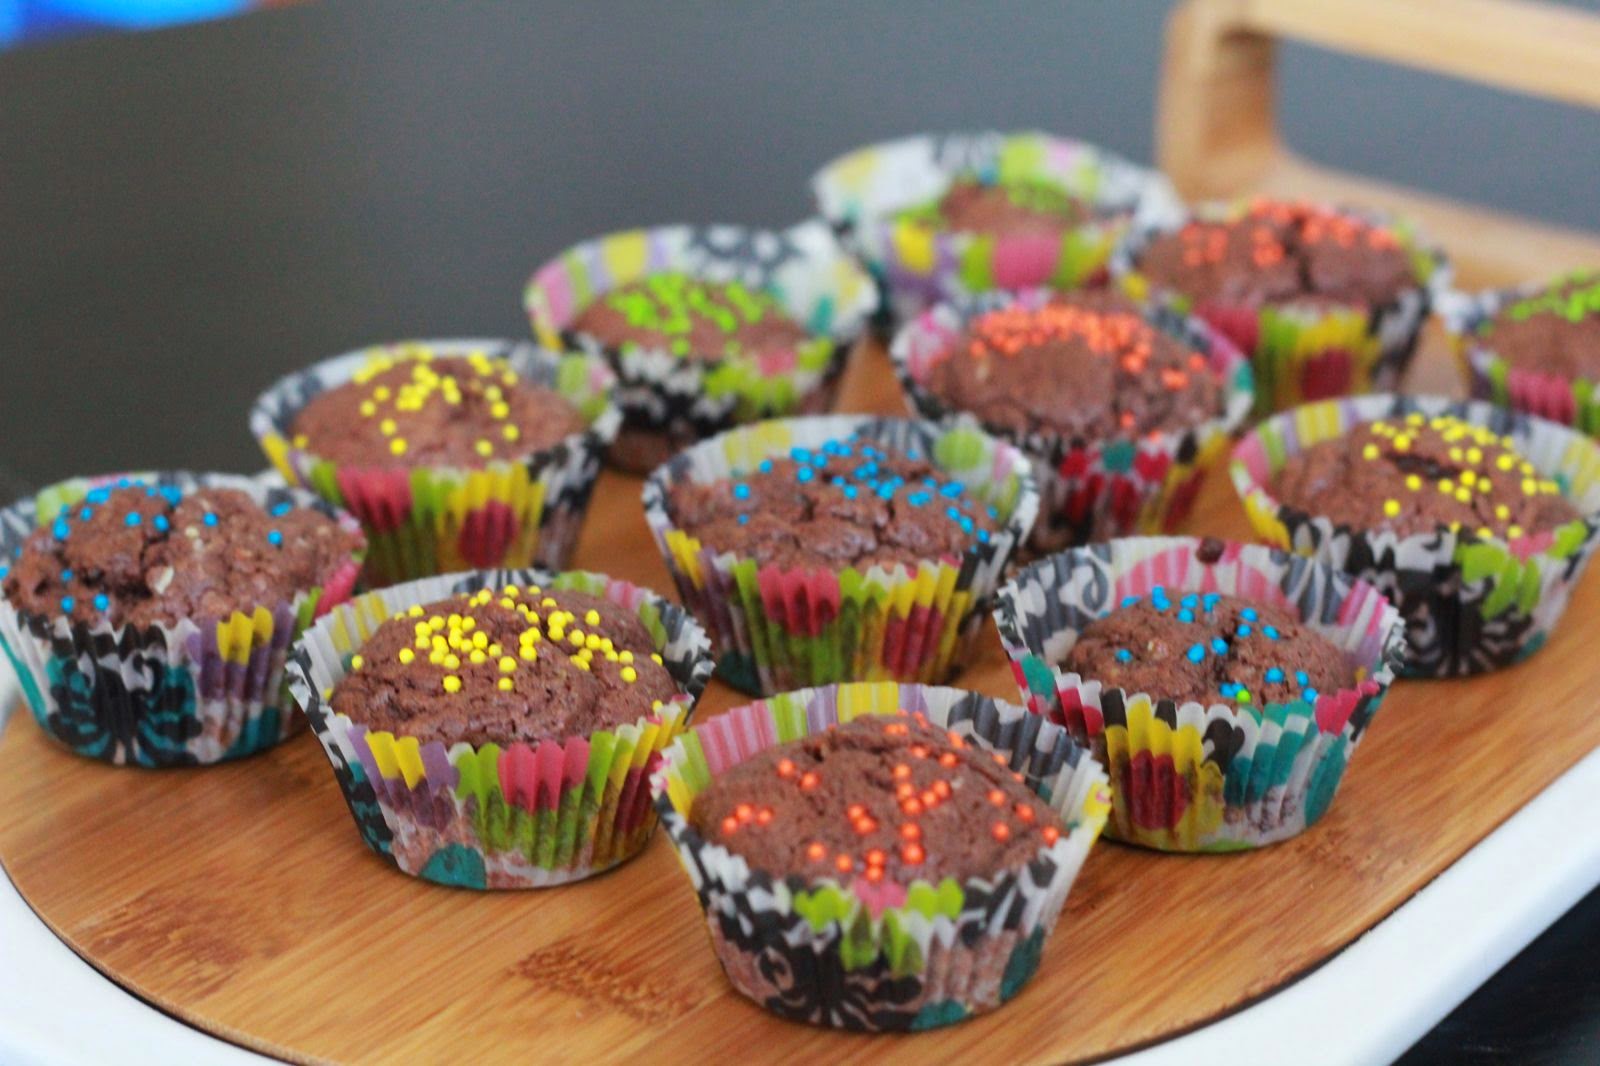
Nutella Brownie Bites- 4 ingredients!
4 ingredients can lead to one perfect little dessert bite.
- 1 cup Nutella
- 10 Tbsp flour
- 2 eggs
- Crushed almonds or sprinkles to top
(couple pinches of salt)- freebie :)
Mix all of these and spoon into mini muffin pan with pretty liners.
Bake at 350F for 15-18 minutes.
Serve at your next party and become everyone's best friend :)
Tuesday, April 17, 2012
Mango Lime Sorbet
One fine day, this recipe appeared in my inbox courtesy Vegetarian Times. As some of you may know, dessert is not really my calling but I was totally fascinated with the idea of making my own sorbet and what better time to experiment when it's just beginning to get warm outside.. so I can perfect my recipe in time for summer. Right? And the commercials on the local Indian Radio Station about the latest arrival of sweet mangoes were taunting me. After all, I learnt in grade 1 that mangoes are the king of all fruit. So, why not make sorbet in its honor?
In India when I was little, my grandfather used to bring home the ripest mangoes during mango season. And if I was the only kid in the house at the time (meaning no cousins), I was lucky.. the pit was mine. Sucking the pulp out of that slimy pit was something else. And if there were others competing for the pit, well, let's just say the strongest survived- LOL.
The original recipe uses frozen mango but in all honesty, frozen fruit just sounds blech to me, no matter what. Fruit is meant to be fresh. No buts. And in the summer I'm a fresh fruit fanatic. A quick bit of research revealed I didn't need a sorbet maker or anything. Just a shallow freezer safe glass dish and some patience. Ridiculously easy to put together.
Ingredients:
- 2 cups mango cut into little chunks
- 1/4 cup agave nectar
- 4 Tbsp freshly squeezed lime juice
Directions:
Place mango chunks in blender or food processor, and purée with agave nectar and lime juice. Transfer to shallow glass or metal bowl, and place in freezer. Freeze 30 minutes. Stir purée with fork every 30 minutes until ready to serve.
The stirring is very important so the puree doesn't crystallize and turn into a mango ice block.
Monday, January 16, 2012
Peda for Pongal
One of the first festivals in the New Year that is celebrated in India is Pongal or Sankaranti. It is the celebration of the harvest season and end of winter.
I am not the hugest fan of kheer or payasam that is traditionally made as the sweet item for a festival, so I opted to make Milk Peda. It seriously couldn't be easier. 5 ingredients. 5 minutes or less in the microwave. And you have a really delectable dessert on your hands.
I came across this recipe few years ago and instantly became one of my favourites because it was so simple but really tasty and a crowd pleaser. And I'm a sucker for milk based sweets.
Ingredients:
- 1 1/2 cups milk powder/dry milk
- 1 can sweetened condensed milk
- 5-6 cardamom pods, seeds crushed
- a few saffron threads
- 2 Tbsp room temperature butter
- ghee to grease the hands (you'll see why)
- pistachios for garnish (optional)
Directions:
| Combine milk powder, condensed milk, cardamom, saffron and room temperature butter in a large microwavable bowl |
| Microwave one minute at a time for 4-5 minutes, stirring after each minute till you get a combined "dough" or fudge like consistency |
| Grease palm of your hand with a bit of ghee and roll out into little balls and flatten. Do this when the dough is still fairly warm. Garnish with pistachios. |
Thursday, September 1, 2011
Raspberry Peach Buttermilk Loaf
When I'm on a roll it's hard to stop.
It felt like that yesterday which started off baking the Nutella cookies even before I was finished with my cup of Timmys coffee. No I wasn't crazy, I just wanted to get the baking started as quick as possible before it hit a billion degrees outside. I had put off baking all summer (for the most part) because of the crazy heat but no more. The cookies were the beginning.
I came across this beautiful Raspberry Buttermilk cake on foodgawker and it immediately caught my attention. I only had about half a cup of raspberries but I had other seasonal fruit begging to be consumed in the fridge. And I had buttermilk. And I was baking cookies which meant the oven would be on anyway.....which meant... you get the idea.
This is a really really easy recipe that it's quite shocking how something so easy can taste so good. But I'm not kidding. You just have to try it to believe it. I turned the original recipe that was a cake into a loaf and made a few other modifications. The end result was amazingly light, fruity and delicious.
You'll see... y'know when you make it. ;-)
[Original recipe adapted from smittenkitchen]
Ingredients:
- 1/2 cup raspberries
- 1/2 cup cut fresh peaches
- 3/4 cup AP flour
- 1/2 cup ground oats (whole oats ground up in a food processor)
- 1/2 tsp baking powder
- 1/2 tsp baking soda
- 1/4 tsp salt
- 1/2 stick butter
- 1 tsp vanilla extract
- 1/2 cup well shaken buttermilk
- 2/3 cup sugar
- 1 large egg
- 1 tsp lemon zest (optional)
Directions:
1. In a large mixing bowl, add all the dry ingredients (flour, baking soda, baking powder, salt and ground up oats). Sifting the AP flour ensures there are no lumps.
2. In another mixing bowl, cream butter and sugar for a few minutes.
3. Add the egg and vanilla and continue to beat the mixture for a minute. I use a regular ol hand mixer and it works fine for all my baking purposes.
4. Add the buttermilk and mix together with a whisk.
5. Next, add the dry ingredients into the wet ingredients in thirds, stirring with a wooden spoon just until combined. Do not overmix.
6. Pour the dough into a loaf pan and decorate with the pretty berries. I bet this recipe will work great with blueberries too.. In fact I think the contrast between raspberries and blueberries will look stunning.
If any of you out there try with a different fruit, let me know.. I'd love to see pictures.
7. Bake at 350 F for 30 minutes or until the center is cooked. Use a fork or a toothpick to test.
8. Allow to cool before popping out of loaf pan and devouring.
I love the texture of the gritty ground up oats and the fresh fruit is really really good.
All that's left a day later are crumbs.
Monday, August 15, 2011
Lemon Berry Bars
Last night was the Finale of The Next Food Network Star. What better way to enjoy the crowning of a new star than by pretending to be a foodie star yourself? Keyword being "pretending". Lately I've been scouring foodgawker for new and interesting recipes and of course drooling over pictures, dreaming that some day one of my pictures will be accepted, and I will have my own foodgawker gallery. Someday. But until then, nothing is stopping me from trying out all those droolicious recipes. I think I just invented a word. :P
I came across these lemon-raspberry bars on foodgawker. They looked amazing and more importantly super easy to make. It seemed like the ideal thing to make for a hot summer evening and enjoy while watching the finale of my favourite food show. They were adapted from LiveLovePasta.
Ingredients:
Crust:
- 1 1/2 cups graham cracker crumbs
- 6 Tbsp melted butter
Filling:
- 2 large egg yolks
- 1/2 cup lemon juice (makes it very lemony, reduce a bit if you don't want that much citrus flavour)
- 1 tsp lemon zest
- One 14oz can sweetened condensed milk
- 8-10 oz fresh raspberries and blueberries combined
Directions:
1. Crush the graham crackers in the food processor. Preheat oven to 350F.
2. Melt the butter and combine with the crumbs
3. In a large mixing bowl, mix the egg yolks and condensed milk till fully combined.
4. Pour in the lemon juice and zest and stir till the mixture slightly thickens.
5. Gently fold in the berries. Do not overmix or you will end up with berry pieces leaking!
6. Spray the bottom of an 8inch baking dish with cooking spray so that the graham cracker crust doesn't stick. Trust me, this is an important step or you will end up with messy bars when you cut it up!
7. Press the graham cracker mixture to the bottom of the dish creating an even layer with your fingers.
8. Bake for 10 minutes.
9. Remove and let cool to room temperature.
7. Pour the condensed milk mixture evenly onto the graham cracker base and bake for 15 minutes.
8. Cool on the counter till it reaches room temperature and then pop in the freezer for a couple of hours before digging in!
Potential modifications for next time:
- I would try a vanilla bean based mixture instead of lemon
- Line the baking dish with parchment with a bit of parchment sticking out so you can pull out the entire thing onto a platter before cutting it. It would make for a much cleaner presentation.
- Mix in a Tbsp of nutella!
Any other suggestions?
I came across these lemon-raspberry bars on foodgawker. They looked amazing and more importantly super easy to make. It seemed like the ideal thing to make for a hot summer evening and enjoy while watching the finale of my favourite food show. They were adapted from LiveLovePasta.
Leftovers Never Looked So Good!!
Ingredients:
Crust:
- 1 1/2 cups graham cracker crumbs
- 6 Tbsp melted butter
Filling:
- 2 large egg yolks
- 1/2 cup lemon juice (makes it very lemony, reduce a bit if you don't want that much citrus flavour)
- 1 tsp lemon zest
- One 14oz can sweetened condensed milk
- 8-10 oz fresh raspberries and blueberries combined
Directions:
1. Crush the graham crackers in the food processor. Preheat oven to 350F.
2. Melt the butter and combine with the crumbs
3. In a large mixing bowl, mix the egg yolks and condensed milk till fully combined.
4. Pour in the lemon juice and zest and stir till the mixture slightly thickens.
5. Gently fold in the berries. Do not overmix or you will end up with berry pieces leaking!
6. Spray the bottom of an 8inch baking dish with cooking spray so that the graham cracker crust doesn't stick. Trust me, this is an important step or you will end up with messy bars when you cut it up!
7. Press the graham cracker mixture to the bottom of the dish creating an even layer with your fingers.
8. Bake for 10 minutes.
9. Remove and let cool to room temperature.
7. Pour the condensed milk mixture evenly onto the graham cracker base and bake for 15 minutes.
8. Cool on the counter till it reaches room temperature and then pop in the freezer for a couple of hours before digging in!
Potential modifications for next time:
- I would try a vanilla bean based mixture instead of lemon
- Line the baking dish with parchment with a bit of parchment sticking out so you can pull out the entire thing onto a platter before cutting it. It would make for a much cleaner presentation.
- Mix in a Tbsp of nutella!
Any other suggestions?
Friday, December 3, 2010
Brownies with an unexpected twist
What's the first thing that comes to mind when you think of Brownies?
These brownies have *gasp* pureed veggies in them. And not one tsp of white sugar. Intrigued?
Try them for yourself. Top with a thin layer of nutella for that little bit of sweetness and add chopped hazelnuts or walnuts for a really nice texture.
Healthy Brownies
Ingredients:

- Nonstick cooking spray
- 3 oz semisweet or bittersweet chocolate
- 1/2 cup carrot puree
- 1/2 cup spinach puree
- 1/2 cup firmly packed light or dark brown sugar
- 1/4 cup unsweetened cocoa powder, sifted
- 2 tbsp soft tub margarine (i used butter)
- 2 tsp pure vanilla extract
- 2 large egg whites
- 3/4 cup oat flour or all-purpose flour, sifted
- 1/2 tsp baking powder
- 1/2 tsp salt
Directions:
1) Preheat oven to 350 F. Coat an 8x8 inch baking pan with cooking spray
2) Melt the chocolate in a double boiler or over a very low flame.
3) In a large bowl, combine the melted chocolate, vegetable purees, sugar, cocoa powder, margarine, and vanilla and whisk until smooth and creamy, 1 to 2 minutes.
4) Whisk in egg whites. Stir in the flour, baking powder, and salt with a wooden spoon.
5) Pour the batter into the pan and bake 35 to 40 minutes. Cool completely in the pan before cutting into 12 bars.
Note: Make sure they are cooled completely, that's when the spinach flavour disappears. Top with a touch of Nutella and toasted hazelnuts/walnuts for texture.
- Chocolaty goodness?
- Sweet treat... oh melt in your mouth?
- I really shouldn't be indulging but what the heck, I've been a good girl, so I deserve it?
- All of the above?
These brownies have *gasp* pureed veggies in them. And not one tsp of white sugar. Intrigued?
Try them for yourself. Top with a thin layer of nutella for that little bit of sweetness and add chopped hazelnuts or walnuts for a really nice texture.
Healthy Brownies
Ingredients:
- Nonstick cooking spray
- 3 oz semisweet or bittersweet chocolate
- 1/2 cup carrot puree
- 1/2 cup spinach puree
- 1/2 cup firmly packed light or dark brown sugar
- 1/4 cup unsweetened cocoa powder, sifted
- 2 tbsp soft tub margarine (i used butter)
- 2 tsp pure vanilla extract
- 2 large egg whites
- 3/4 cup oat flour or all-purpose flour, sifted
- 1/2 tsp baking powder
- 1/2 tsp salt
Directions:
1) Preheat oven to 350 F. Coat an 8x8 inch baking pan with cooking spray
2) Melt the chocolate in a double boiler or over a very low flame.
3) In a large bowl, combine the melted chocolate, vegetable purees, sugar, cocoa powder, margarine, and vanilla and whisk until smooth and creamy, 1 to 2 minutes.
4) Whisk in egg whites. Stir in the flour, baking powder, and salt with a wooden spoon.
5) Pour the batter into the pan and bake 35 to 40 minutes. Cool completely in the pan before cutting into 12 bars.
Note: Make sure they are cooled completely, that's when the spinach flavour disappears. Top with a touch of Nutella and toasted hazelnuts/walnuts for texture.
Tuesday, September 28, 2010
Mamma Mia! I made a Tiramisu!
If there is one dessert besides a cheesecake, that captures my tastebuds, it is the Tiramisu. Simple layers of ladys finger and a mascarpone cream topping finished off with shaved dark chocolate and dusting of cocoa powder. That's it. I have stayed away from attempting to make this for so long because it seemed intimidating. How can something this delicious be easy to make? And I don't consider myself a desert diva or anything... far from it actually.
But this year for R's birthday I asked him if he would like me to make a Tiramisu instead of a traditional cake or a cheesecake even. I think it was like asking him would you like to go to the Carribean or The Bahamas for vacation. LOL.
Let me first say this- If you have never tried making a tiramisu but love it, it is so easy to make, that the prep time takes all of maybe 20 minutes. The remaining 6-7 hours is the time it takes to set in the fridge. So yes it involves a bit of planning, not something that can be whipped up at the last minute. (I do have such other desserts for another blog entry). Oh and not too long ago, believe it or not, I got to taste both my favourite desserts IN ONE SINGLE DISH!!!! I kid you not- The Cheesecake Factory has this most amazing, smooth Cheesecake Tiramisu, it's insanely yummy. They serve it with a huge helping of whipped cream which is not warranted but you be the judge of that.
This recipe is loosely based off of Giada's Tiramisu but I made mine in a 8x8 baking dish so I adjusted the proportions to the best of my "baking" knowledge.
Tiramisu
Ingredients:
Method:
But this year for R's birthday I asked him if he would like me to make a Tiramisu instead of a traditional cake or a cheesecake even. I think it was like asking him would you like to go to the Carribean or The Bahamas for vacation. LOL.
Let me first say this- If you have never tried making a tiramisu but love it, it is so easy to make, that the prep time takes all of maybe 20 minutes. The remaining 6-7 hours is the time it takes to set in the fridge. So yes it involves a bit of planning, not something that can be whipped up at the last minute. (I do have such other desserts for another blog entry). Oh and not too long ago, believe it or not, I got to taste both my favourite desserts IN ONE SINGLE DISH!!!! I kid you not- The Cheesecake Factory has this most amazing, smooth Cheesecake Tiramisu, it's insanely yummy. They serve it with a huge helping of whipped cream which is not warranted but you be the judge of that.
This recipe is loosely based off of Giada's Tiramisu but I made mine in a 8x8 baking dish so I adjusted the proportions to the best of my "baking" knowledge.
Tiramisu
Ingredients:
- 3 egg yolks
- 2 Tbsp sugar
- 1 8oz container of mascarpone cheese
- 1.5 cups of strong espresso cooled
- 2 Tbsp dark rum
- 24 package lady fingers
- Unsweetened cocoa powder for garnish
- Dark chocolate shavings for garnish
Method:
- In a large bowl, using an electric or stand mixer, beat the egg yolks and sugar for 5 minutes until they become thick and pale yellow. Add mascarpone cheese and beat until smooth.
2. Add one or two tbsp esperesso and mix till combine. At this point you could choose to add a bit of vanilla (1 tsp). The originial recipe doesn't call for vanilla so I didn't add any but I have come across other recipes that add vanilla. Personally I think it tastes great without the vanilla.
3. Add 1 Tbsp rum to this mixture.
4. In a small shallow dish, combine the remaining espresso and rum.
5. Soak each ladyfinger into this mixture for no more than 5 seconds and arrange in an 8x8 dish. If you soak them too long, they will fall apart. Break them in half if needed to neatly arrange everything in the dish.
6. Pour half the mascarpone mixture on top of the ladyfingers and repeat for another layer of soaked ladyfingers and mascarpone.
7. Cover with plastic scrap and let it set in the fridge for about 6-7 hours for best results.
8. Before serving dust with unsweetened cocoa powder and garnish with some dark chocolate curls (use a vegetable peeler to get beautiful looking curls).
Wednesday, September 1, 2010
MickeyD's Oatmeal Bars
My friend and runner MickeyD posted this few days back. I'm not easily captivated by bars and baking in general but this one looked really easy and yummy! I made it within a few hours of her posting it. :-P I had to use up some butter and eggs before we left anyway.
Chewy Oatmeal Bars
- 1 c. butter
- 2 eggs
- 1/2 tsp vanilla
- 2 c. flour
- 1/2 c. roasted peanuts
- 2 c. brown sugar
- 1 tsp. salt
- 1 tsp. soda
- 2 c. quick oats
- 6 oz. chocolate chips.
Grease 15 1/2 x 10 1/2 pan. Cream butter, sugar, eggs and vanilla together until fluffy. Stir in flour, soda and salt. Add oats and mix well. Spread in pan. Sprinkle nuts and chocolate chips on top. Bake 10 minutes at 400 degrees. Do not over bake. Can add mini M&Ms to top for color.
* I made half a batch in a square 8" pan. It turned out great. I also baked it for exactly 10 minutes but in hindsight, it could have used a couple more minutes in the oven.
* Another potential future modification is to add a Tbsp or so of creamy peanut butter to the batter!
YUMMO!!!!!
Wednesday, April 14, 2010
Carrot Halwa {Old Post, New Pictures}
Happy Diwali- The Festival of Lights!
A new beginning! This calls for special dish(es) to be prepared in celebration. One of the sweets I can claim to be "experienced" in is Carrot Halwa- The Diet version ;-)
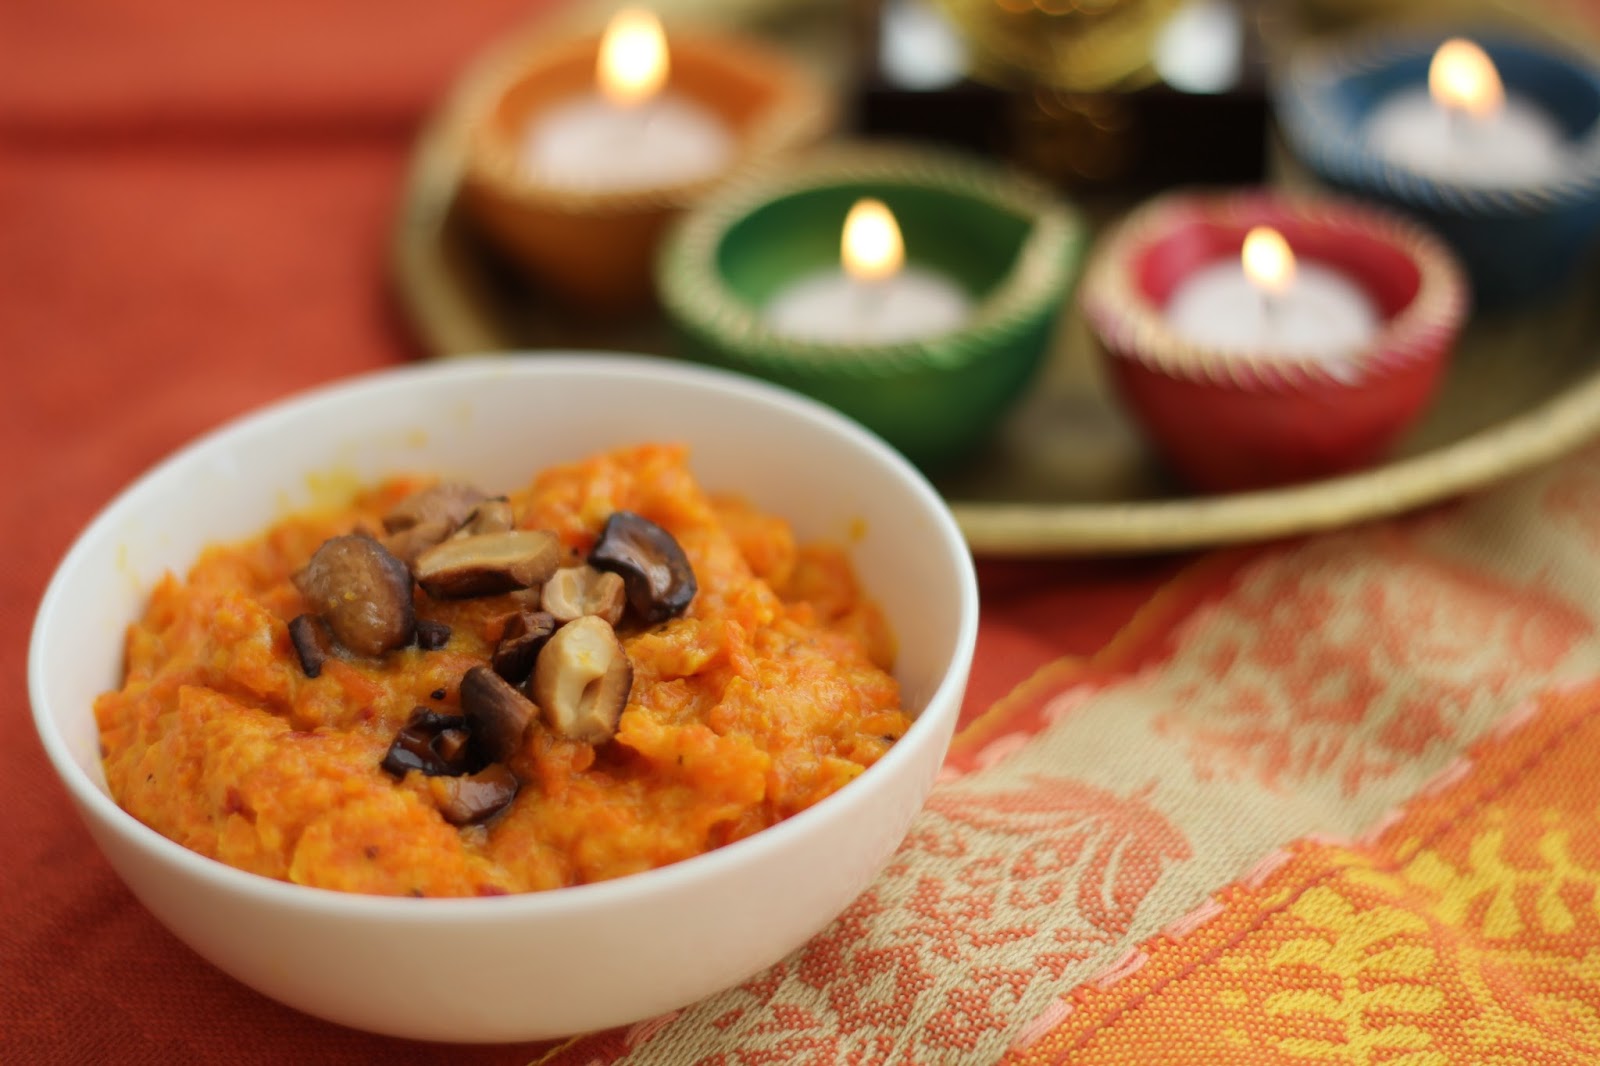
Rather than trying to explain what halwa is, this is what it looks like:
Ingredients:
* 4-5 medium carrots- peeled and grated
* 1/2 gallon (2L for you Canadian readers) 2% milk
* 1/2 cup sugar
* 4-5 cardamom seeds (removed from the pod)
* 1/2 tsp vanilla extract
* 2 tsp ghee, preferable homemade (clarified butter)
Directions:
1. In a large non stick Dutch oven (non stick is really the key), bring the milk to a boil and then reduce to simmer (medium-high).
When the milk is partway reduced, add the sugar and carrots and cardamom and continue stirring every so often to ensure even cooking. Stirring also helps to make sure the milk doesn't stick to the bottom of the pot.
Keep at this process of stirring for the next hour or more, until the mixture is considerably reduced and you can smell a caramelly aroma.
Finally you will get a mixture that looks like this-
A new beginning! This calls for special dish(es) to be prepared in celebration. One of the sweets I can claim to be "experienced" in is Carrot Halwa- The Diet version ;-)
Rather than trying to explain what halwa is, this is what it looks like:
It's basically a reduction of milk, carrots, sugar and a bit of spice. And it takes a looooong time, about 2 hours, for the milk to reduce. So if you are in a hurry, this is not the ideal dessert!! But let me tell you, the end result is sooo worth it. And it's best consumed warm.
I make mine the diet version with less sugar, and reduced fat milk and just a couple teaspoons of ghee, but you achieve a richer texture and taste with full fat milk and a lot more ghee.
Ingredients:
* 4-5 medium carrots- peeled and grated
* 1/2 gallon (2L for you Canadian readers) 2% milk
* 1/2 cup sugar
* 4-5 cardamom seeds (removed from the pod)
* 1/2 tsp vanilla extract
* 2 tsp ghee, preferable homemade (clarified butter)
Directions:
1. In a large non stick Dutch oven (non stick is really the key), bring the milk to a boil and then reduce to simmer (medium-high).
When the milk is partway reduced, add the sugar and carrots and cardamom and continue stirring every so often to ensure even cooking. Stirring also helps to make sure the milk doesn't stick to the bottom of the pot.
Keep at this process of stirring for the next hour or more, until the mixture is considerably reduced and you can smell a caramelly aroma.
Finally you will get a mixture that looks like this-
At this point you can shut off the heat, add the vanilla and ghee and stir well.
Enjoy when warm!!!!!
Subscribe to:
Posts (Atom)